Bunker Alfa is one of several Army bunkers that can be found on the Global Map. It consists of a separate ground-floor level and four sublevel portions that can be accessed via passcode (obtainable from dead soldiers in resource areas or with CB Radio). The underground floors can be quite difficult to survive for lower-leveled players, and it is a good idea to bring decent armor and weapons to these floors. This is doubly true for hard mode.
Despite the risk, venturing into the bunker's lower levels can be quite lucrative for those who are capable of surviving its dangers. In addition to giving access to loot-filled reward chests, the bunker also offers a method of modifying firearms to make them stronger.
Features
There are several features unique to Bunker Alfa, such as modified zombies, Turrets, the Coupon Exchange system, and special objects or rooms.
Creatures
Unlike their counterparts outside the bunker, some of the zombies in the sublevels have unique traits. Most notably, they do not use special attacks, and they have altered (usually reduced) sight ranges, including attacking the player in groups if one is alerted. They also do more damage than zombies outside the bunker.
- Roamer (2nd floor only, 40 HP)
- Fast Biter (80 HP)
- On your first time entering, there are five on Floor 1.
- Toxic Spitter (No spitting attack, 100 HP)
- Floater Bloater (2 types, no sumo attack, both with 240 HP)
- On your 'first time entering, there is one on Floor 1.'
- Toxic Abomination (2 types, no sumo attack, both with 300 HP)
- Frenzied Giant (2 types, both with 500 HP)
- Hard mode FG has greater speed, further accelerated when injured to below 150 HP.
- Exploder
- The Blind One (1000 HP, heals at 700 and 400 HP)
- The Blind One appears during hard mode only, on Floor 3, past an antechamber and access terminal.
Infrastructure and Security
- Electrified Fence: This does damage to the player at a very high rate when in contact.
- Elevator: This allows movement to other floors. Each floor loads as a separate zone.
- Generator: (Nonfunctional in current versions) In previous versions, activating generators was necessary to provide power for access to lower sublevel floors.
- Laser Tripwire Alarm: Crossing these lasers sounds an alarm that alerts a group of nearby enemies to the player's presence.
- Terminals: Accessing computer terminals performs various actions such as remotely opening doors or turning off laser tripwire alarms.
- Turret: An automated turret attacks the player once in range. It has 250 HP, a 360-degree attack radius, and range approximately equivalent to the Glock 17. Turrets have an armor rating that reduces incoming damage by half. These turrets do not attack zombies.
- Heavy Turret: Appears on 4th floor only. It has 500 HP, a 360-degree attack radius, an armor rating that reduces incoming damage, and range approximately equivalent to the normal turret. Heavy turrets not only shoot but also launch grenades (like the MILKOR MGL) at you. These turrets do not attack zombies.
Other Hazards
- Gas Chamber: This is a room entirely filled with poisonous gas. The gas does damage to the player at a very high rate unless they are equipped with a Gas Mask (which absorbs damage while exposed to gas, until breakage).
- Gas Leaking from Pipes: Some areas contain gas bursting from pipes. This gas does damage to the player at a very high rate. Depending on the location, some pipes can be shut off from a source valve, or the gas may only leak at periodic intervals and can be passed if timed properly. Additionally, the Gas Mask can be equipped to protect the player from damage, as in the Gas Chamber. Zombies are immune to the effects of gas.
- Gore: Gore is usually indicated by a red-colored area on the Minimap. The effect on the player is to reduce their movement speed while in these areas by approximately half; zombies are unaffected. Additionally, in halls with arms protruding from walls, contact with the arms will cause 3 damage to the player. These arms do not damage armor.
Upper Level
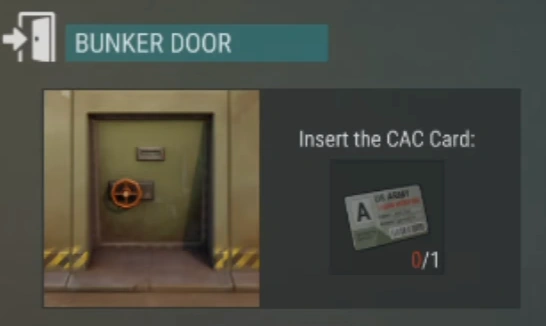
The outside area of the main level contains several Pine Trees and a lootable corpse with a half-used Glock 17 in its inventory. To gain entrance to the Bunker's interior, a CAC Card A is required for first-time access. After using the access card, this area will remain unlocked permanently.
With update 1.8, a minigun drop was added in a cage against the exterior wall of Alfa, only accessible with a Rank IV True Friend dog.
Inside, there are no zombies but several lockers containing useful Items. These items on the upper level do not reset. While this prevents returning for new loot, it allows the area to function as a storage location separate from the player's home. There are seven separate lockers.
Code
To access the sublevels of the bunker, a passcode must be entered into the computer terminal in the main building on the ground floor. This passcode changes every day and must be manually entered every time the bunker resets (48 hours after it was last opened). The code is shared between all players on a particular operating system (Android and iOS users have different codes) and can be found at the following locations:
- CB Radio: This furniture can be built in your home base, and an exclamation point icon will appear over it to notify you of a new daily code or if another new message is available. Tune it to the correct frequency to view the new code.
- Dead Soldier: This corpse can be found in resource zones and appears as a red "X" on the Minimap in those zones. Upon looting this corpse, a dialogue box will appear with the current code. These bodies cannot be looted; there are no Items to take from them.
"More Power" Error Message
On some mobile devices, if you attempt to input the passcode into the bunker's terminal, you will receive the following error message: "It seems that the device needs more power." This means the mobile device on which you are playing the game does not meet the minimum specifications to handle the lower levels of the bunker. Although recent optimizations will reduce the number of players who see this message, for some players, it may be time for an upgrade!
Sublevels
The sublevels portion of the Bunker functions differently from the ground floor. A unique code, which changes every day, is required for access to the underground. Once the terminal is activated, an entrance appears and a unique instance of the sublevels is created which lasts for 48 hours (from the time of opening) before reset.
During this period, all progress is saved including enemies killed, items looted, and the corpse of the last player death. Upon reset, the sublevels can be revisited with a new code. All enemies will have respawned and items will be reset. As of version 1.5.6, the primary method of obtaining the most valuable Items is via a coupon-exchange system.
Floor 1 - Lobby
The first sublevel serves as a "lobby" area and contains several features related to the lower areas of the bunker. A notable feature of this floor is the Coupon Exchange terminals, which can be used to obtain loot-filled reward crates. There is also an Army Specialist who can be rescued at the end of the second sublevel and will return to the lobby and unlock the Overseer Room, where he will offer several benefits to the player.
Locked door: The stuck door near the green coupon crate distribution gate became a doggy door (A dog with the skill True Friend is required.) with update 1.7.9, then it became a stuck door again with update 1.8.
Coupon Exchange
Coupons for the reward terminals can be found on the corpses of defeated Creatures and from boxes/lockers in the bunker. Additionally, coupons have a low chance of being found outside the bunker (red zones, airdrop events).
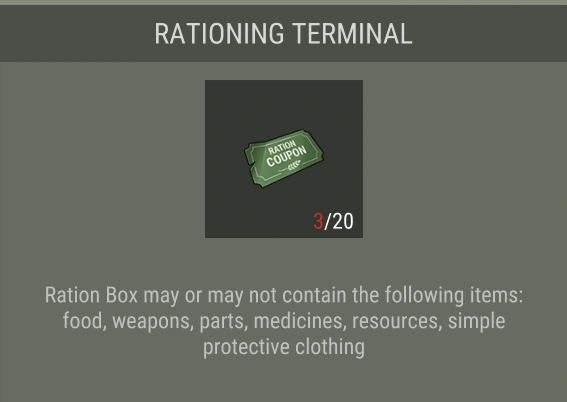
- Rationing Terminal: 20 green coupons are required for each Ration Box. Each Ration Box has a chance of containing food, weapons, parts, medicine, resources, and simple protective clothing but may contain none of them.
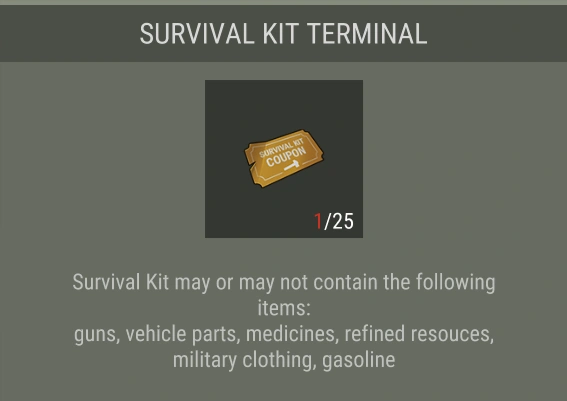
- Survival Kit Terminal: 25 yellow coupons are required for each Survival Kit. Each survival kit has a chance of containing guns, vehicle parts, medicines, refined resources, military clothing, and gasoline but may contain none of them.
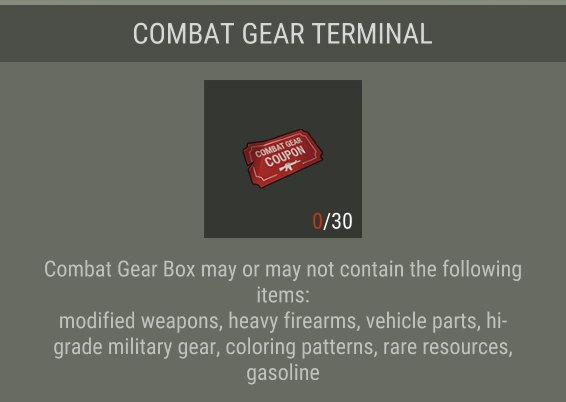
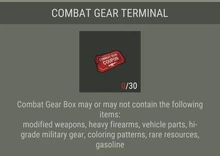
- Combat Gear Terminal: 30 red coupons are required for each Combat Gear Box. Each Combat Gear Box (by far the best in terms of gear) has a chance of containing modified weapons, heavy firearms, vehicle parts, high-grade military gear, paint patterns, rare resources, and gasoline but may contain none of them. The Combat Gear Box is currently the only box in-game with a chance of containing the Chopper Gas Tank outside the In-Game Shop.
Overseer Room
- The Specialist will accept Personal Effects, Identification Tags, and Military Notebooks (obtained, mostly in lieu of comparable coupons, by killing zombies during Hard Mode), rewarding the player with reputation, which unlocks new weapons, firearm modifications, and Floppy Disks.
- Each level of Reputation requires 140 points; Identification Tags are 1 point, Personal Effects are 2 points, and Military Notebooks are 3 points.
- The specialist will modify the Glock 17, M16, and AK-47 (depending on reputation), consuming Weapon Parts, Gun Oil, and Steel Bars in the process.
- The Tactical Terminal uses the Floppy with Coordinates to give the location of a valuable loot crate or Infected Box (creating a new, limited-time event on the Global Map).
- The bunker's Hard Mode can be activated in this room, although this is not recommended for inexperienced or under-geared players.
Floor 2
Notable features on Floor 2 include gas leaking from pipes (some of which can be shut off by a valve), gore areas, a terminal-controlled door, a turret, and Frenzied Giants, among other enemies.
F2 = 8 Roamers, 13 Biters, 5 Spitters, 8 Floaters, 5 Abominations, 7 Frenzied, 1 Turret
Floor 3
Notable features on Floor 3 include an electrified fence, a gas chamber, gas leaking from pipes, a generator, a gore area, terminal-controlled doors and laser tripwire alarm, and a turret. Additionally, the Acid Bath blueprint is learned from a drafting table in one of the final rooms.
F3 = 3 Biters, 26 Spitters, 1 Floater, 17 Abominations, 11 Frenzied, 1 Turret
Floor 4
Notable features on Floor 4 include 3 cold rooms (2 of which contain a new type of indestructible spike mine trap (8 total)), 2 terminals, 1 generator, and 2 doggy doors (A dog with the skill True Friend is required.). Loot on this floor may include copper ore and bars or steel, as well as turret parts.
F4 = 7 Biters, 6 Spitters, 1 Floater, 4 Abominations, 3 Frenzied, 3 Turrets, 3 Heavy Turrets, 7 Numb Zombies, 4 Frozen Bloaters, 8 Spike Mines
Maps
Bunker Alfa Map (Floor 2) 1.6.9+


Bunker Alfa Map (Floor 3) 1.6.9+


Bunker Alfa Map (Floor 4) 1.7.9+


Note: Doomeris' maps indicate a total of 6 spike mine traps, but there are 8, 4 in each location.
Sublevels - Hard Mode
Following the activation of hard mode in Bunker Alfa, an alarm sounds and the lights strobe red. While hard mode is active, creatures generally drop reputation items instead of coupons, with similar values and frequencies. During hard mode, creatures hit harder and have higher defense against attacks. There are also some creatures that only appear in Bunker Alfa during hard mode.
Floor 1 - Lobby - Hard Mode
The lobby is unchanged after hard mode is activated; neither creatures nor crates reset. Hard mode activation is irreversible until the code activation of the entire subterranean complex expires at the end of its two-day window. After the bunker fully resets, it will return to normal mode when the new code is entered.
Floor 2 - Hard Mode
Notable features on Floor 2 during hard mode include all the security and infrastructure features of normal mode, plus buffed zombies, some Toxic Abominations replaced by Exploders, and high-speed Frenzied Giants.
Floor 3 - Hard Mode
Notable features on Floor 3 during hard mode include all the security and infrastructure features of normal mode, plus buffed zombies, some Toxic Abominations replaced by Exploders, high-speed Frenzied Giants, and The Blind One (including an outer room with an activation console and hanged scientist and an inner room with gore, alarms, and Blind One).
Floor 4 - Hard Mode
Notable features on Floor 4 during hard mode include all the security and infrastructure features of normal mode, plus buffed zombies, some Toxic Abominations replaced by Exploders, and high-speed Frenzied Giants.
The cafeteria and starting room areas are the best and most likely only places (excluding the soon-to-come doggy-door zones) where it is easy to kite around Exploders, Frozen Bloaters, and Frenzied Giants. Take advantage of these rooms to make it as easy as possible to kill them.
Maps - Hard Mode
Bunker Alfa Map (Floor 2) 1.6.9+


Bunker Alfa Map (Floor 3) 1.6.9+


Bunker Alfa Map (Floor 4) 1.7.9+


Note: Doomeris' maps indicate a total of 6 spike mine traps, but there are 8, 4 in each location.
Walkthroughs
For any questions/comments regarding these guides, please contact the content creators directly.
◾Savator24's Bunker Alfa Guide
Video Walkthroughs
Bunker Alfa Floor Completion Videos (1.6)


The red-coupon glitch works perfectly for iOS since iOS saves 24/7, but on Android, you might lose your data, so use it at your own risk.


The updated bunker code is posted to Discord's LDoE channel's #bunker-codes thread.
Trivia
- Sublevels were first introduced in version 1.5.
- In previous versions, some Items were required to repair various terminals and generators to progress through the sublevels.
- As of 1.6, Bunker A card is no longer in the inventory of the corpse near the Bunker Alfa door.